
Breathe Right strips are thin, adhesive strips that you place over your nostrils while you sleep. They open your nasal passages to improve airflow and prevent snoring. Ear posting relieves pressure in the inner ear by placing objects against the ear canal walls.
This can be done with cotton balls, rolled-up tissue, or even your fingers.
If you’ve ever had a cold, chances are you’ve used Breathe Right strips. Those little adhesive strips help you breathe better by opening up your nasal passages. But did you know that they can also be used for ear posting?
Ear posting is a technique that’s often used by musicians to help prevent hearing loss. The idea is that placing a Breathe Right strip over your ear canal, it will help reduce the amount of sound that enters your ear and thus protect your hearing. I tried this out recently when I went to see a particularly loud band play live.
I have to say; it worked like a charm! I could still hear the music perfectly well, but it wasn’t as loud and overwhelming as it would have been without the strip. If you’re going to be exposed to loud noise (whether from music or other sources), I highly recommend giving ear-posting with Breathe Right strips a try.
It’s an easy and effective way to help protect your hearing! If you went to know more about breathe right strips ear posting, keep reading!
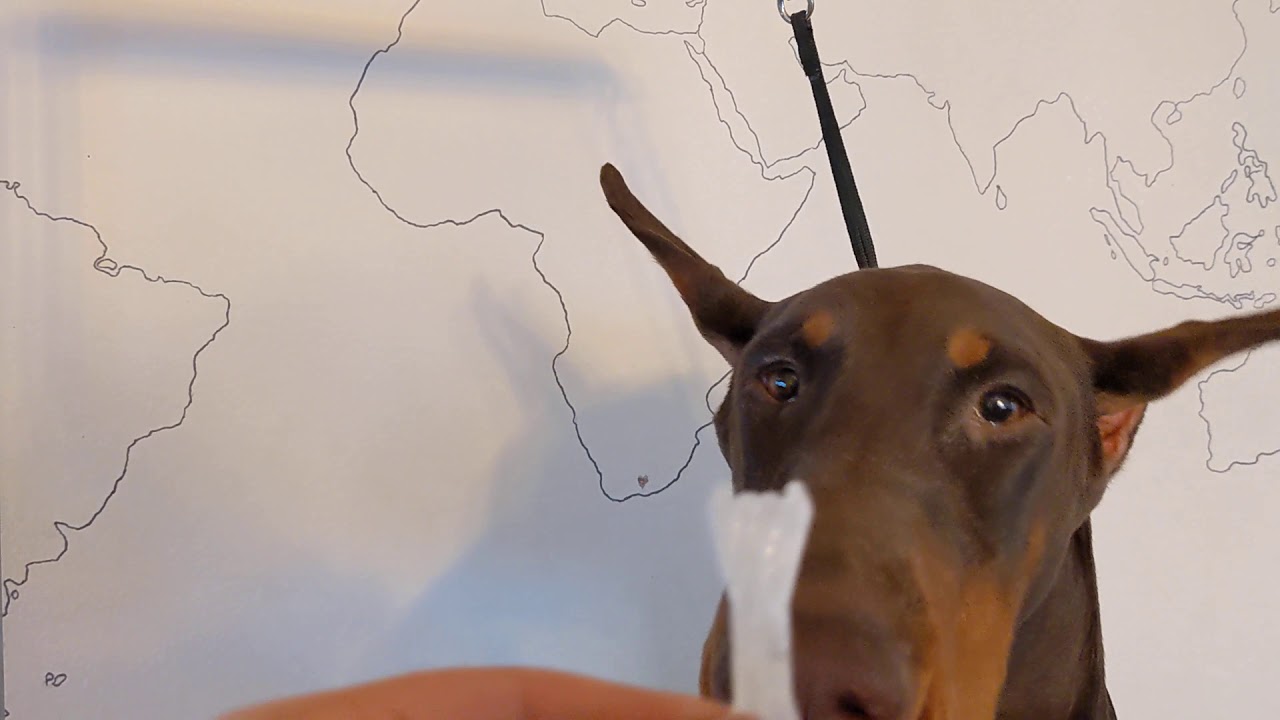
Breathe Rite Strips – Doberman
How Do You Post Ears With Breathe Right Strips?
If you are struggling with snoring, your first instinct may be to buy a pack of Breathe Right strips. But did you know that these same strips can also be used to help reduce the appearance of large, protruding ears? You can achieve better results and improve your appearance by following these simple steps.
1. Start with clean, dry earlobes. If your earlobes are oily or have any makeup on them, make sure to remove them before applying the strip. Otherwise, the strip will not stick as well.
2. Cut the Breathe Right strip into two pieces that will fit comfortably on either side of your earlobe without covering up too much of the lobe itself. The size will vary depending on the size of your earlobe, so make sure to test it before the adhesive strip application.
3. Apply a small amount of water onto each piece of the Breathe Right strip using a cotton swab or your finger. This will help activate the adhesive so that it sticks to your skin better.
4. Place each strip onto either side of your earlobe and press down lightly to ensure good contact between the strip and the skin surface area around the base and top part circumference of your lobe—you don’t want any air bubbles! For extra hold, you can also use a hair dryer set on low heat to slightly melt the adhesive for about 5-10 seconds per side; this is optional but may give better results if you have trouble getting the strips to stay put otherwise. Let dry completely before continuing with step 5 below.
If they’re still not staying put after drying completely & trying Step 4 above again once more, then they, unfortunately, won’t work for you & you should discontinue usage & try another method altogether, such as taping (see next section).
5. Once both sides are secure, take off each Breathe Right strip by gently peeling it away from your skin, starting at one end until it is completely removed… Don’t worry if there’s some residue left behind on your skin; this is normal and will come off easily with soap and water when you wash your face/ears later. And that’s it! You’ve now successfully posted your ears using Breathe Right strips!
How Do You Know When to Stop Posting Your Ears?
There are a few different ways to know when to stop posting your ears. The most reliable way is to use an earwax removal kit that has a light and magnifying glass. With this tool, you can see the wax build-up in your ear and determine when it is time to remove it.
Another way to tell if you need to remove earwax is by using a cotton swab. If the cotton swab comes out clean, then there is no need to remove any wax. However, if the cotton swab has wax on it, it is time to remove it.
The last way to tell if you need to remove earwax is by looking in the mirror. If you see any wax build-up on the inside of your ear, then it is time to remove it.
What Kind of Tape Do You Use to Post Ears?
The type of tape that is typically used to post ears is medical-grade adhesive tape. This type of tape is designed to be gentle on the skin and to provide a stronghold. It is important to ensure that the area around the ear is clean and dry before applying the tape.
How Long Should Ear Posts Be on For?
There is no definitive answer to this question as it depends on several factors, including the type of ear piercing, the age and health of the individual, and the healing process. However, there are some general guidelines that can be followed. If you have had a new ear piercing, it is important to wait at least three weeks before changing or removing the earrings.
This gives the piercing time to heal and helps reduce the risk of infection. After this initial period, you can change your earrings as often as you like, but you should clean them thoroughly before each change. It is generally recommended that children under six years old keep their earrings in for six months to allow for proper healing.
There is no set timeframe for older children and adults, but it is generally advisable to leave earrings in for at least six weeks. Please consult your piercer or doctor if you have any concerns about your piercing or experience any pain or discomfort.

Credit: www.dobermantalk.com
Posting Cane Corso Ears With Breathe Right Strips
Cane Corso ears are large and floppy, making it challenging to keep clean. But with a little bit of effort, you can keep them healthy and looking good. Here’s how to post your Cane Corso’s ears with Breathe Right strips.
First, clean your dog’s ears thoroughly. You can use a cotton ball dipped in warm water or a dog ear cleansing solution. Be sure to get all the way into the creases of the earflaps.
Next, dry your dog’s ears completely. Then, take a Breathe Right strip and cut it into thirds. Apply one strip to the inside of each ear flap, starting at the base of the ear and working up towards the top.
Press the strip firmly in place so that it adheres well. You may need to trim the strips down if they’re too long for your dog’s ears. Leave the Breathe Right strips in place for 24 hours, then remove them and throw them away.
Repeat this process every few days as needed to keep your Cane Corso’s ears clean and healthy!
Posting Dogs Ears Without Tape
Assuming you would like a blog post discussing the benefits of not taping a dog’s ears:
There are many benefits to NOT taping a dog’s ears. First and foremost, it is extremely painful for the dog.
Secondly, it can cause long-term damage to their delicate ear cartilage. Third, it can lead to serious infection if not done properly. Finally, many dogs simply do not tolerate having their ears taped and will spend their entire lives trying to paw at them or rubbing them against furniture, walls, etc.
So why do people still tape dogs’ ears? Unfortunately, there is still a widespread belief that cropped (or docked) ears look more “aggressive” and therefore make better guard dogs. This could not be further from the truth!
A dog’s personality has nothing to do with whether or not its ears are cropped – that’s all determined by how they are raised and trained.
If you’re thinking about cropping your dog’s ears or have already had it done, please consider the above information carefully before moving forward. There are much better ways to achieve the look you want without causing your furry friend unnecessary pain or suffering!
Redline Canine Ear Forms
Redline Canine Ear Forms provide a natural, comfortable way to maintain the shape of your dog’s ears while they are healing from surgery or other trauma. They are easy to use, and work well for both short- and long-term needs. Simply place the form inside your dog’s ear and let it do its job – no tape or adhesives are required!
Best Ear Posting Method
Assuming you would like a blog post discussing the best ear posting method: There are many methods for ear posting, and the “best” method may vary depending on the horse, rider, and situation. Some common ear-posting techniques include using string, yarn, vet wrap, duct tape, or even special commercial devices made specifically for this purpose.
When choosing a method, it is important to consider what will be most comfortable and effective for both the horse and the rider. String or yarn may be less expensive than other options but can be more difficult to keep in place and easily come undone. Vet wrap is often used because it is easy to use and remove and is also relatively inexpensive.
However, some horses may find it irritating. Duct tape is another popular option because it is readily available and easy to use, but it can be hard to remove and may irritate the horse’s skin. Commercial devices are also available specifically designed for ear posting – these can be more expensive but may offer a more secure and comfortable fit for both horse and rider.
Ultimately, there is no “best” way to post ears – it depends on individual horses and riders and what works best for them. Experiment with different methods until you find one that works well for you and your horse!
How to Make Doberman Ears Stand Up Without Cropping?
If you have a Doberman pinscher, you may be wondering how to make its ears stand up without cropping them. Cropping is a common practice for this breed, but it is not the only option. There are a few things you can do to help your Doberman’s ears stand up on their own.
One way to help your Doberman’s ears stand up is by taping them. This can be done with medical tape or even masking tape. Simply put a piece of tape on the top of each ear and then another piece under the chin.
Be sure to use firm pressure when applying the tape so that it doesn’t fall off easily. You will need to leave the tape on for at least two weeks, but longer is better. After two weeks, you can remove the tape and see if the ears have stayed in place.
If they have, great! If not, you can always try again. Another method for making Doberman ears stand up is called “ear posting.”
This involves putting something inside the ear to help prop it up. The most common thing used for ear posting is foam dots cut from pool noodles. You will need two dots per ear, which should be about an inch in diameter.
Put one dot behind the ear and one in front of the tragus (the little flap of skin in front of the ear’s opening). Again, you will need to leave these in place for at least two weeks, but longer is better. If neither of these methods works for your dog, there are always surgical options available from your veterinarian.
Posting Doberman Ears
If you have a Doberman, you’ve probably noticed that their ears are floppy. This is because their ear cartilage hasn’t fully developed yet. Their ears will eventually stand up on their own, but until then, you can help the process along by posting them.
Here’s how to do it:
1. Purchase ear-posting supplies from your local pet store or online. You’ll need surgical tape and cotton balls.
2. Clean your dog’s ears with a gentle cleanser and cotton balls. Be sure to remove any dirt or debris from inside the ear canal.
3. Place a small amount of surgical tape on one side of a cotton ball. Then, attach the cotton ball to the inside of your dog’s ear (near the base). Repeat this step for the other ear.
4. Check your dog’s ears daily to ensure they’re still in place and the skin around them isn’t irritated.
Ear Cropping And Taping
If you have a dog with floppy ears, you may have considered ear cropping and taping to give them a more alert and regal look. Ear cropping is a cosmetic procedure that involves surgically removing part of the ear flap. Taping is then used to keep the remaining portion of the ear in an upright position until it heals.
There are different ways to crop a dog’s ears; your choice will depend on your preference and your veterinarian’s recommendation. The most common methods are the stand, scissor, or wedge crop. In a standing crop, the entire outer edge of the ear is removed.
This provides a very clean look and leaves little hair on the inside of the ear (which can minimize infection risk). A scissor crop removes less of the outer edge of the ear than a standing crop does, resulting in more hair on the inside of the ear. This can make cleaning and care for cropped ears more difficult, but some people prefer this look.
A wedge crop removes only a triangular-shaped piece from the outer edge of each ear, resulting in an intermediate look between a stand and a scissor crop. After your dog’s ears are cropped, they will need to be taped to hold them up while they heal. Many types of tape are available for this purpose; your veterinarian can help you select the best for your dog.
Once your dog’s ears have healed fully (usually within 4-6 weeks), you can remove the tape and let their ears flop down again if you wish – or keep them taped permanently for that always-upright look!
Conclusion
If you’re looking for a way to improve your breathing and reduce snoring, you may want to try to Breathe Right strips. These strips are designed to open up your nasal passages and allow air to flow more freely through your nose. Ear posting is a technique that can help keep the strips in place and improve their effectiveness. Thanks for reading our blog post about breathe right strips ear posting.
